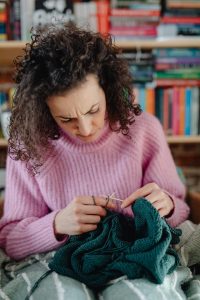
 Yarn stitches come in three basic forms, the most basic being single crochet (also known as ring stitch or half-ring stitch) and double crochet (also called full-ring stitch or treble stitch).
The former is a straightforward technique where all stitches work together with the same needle and yarn. The latter requires a break or pause between each stitch to work the first stitch, as well as inserting your hook into the stitch before continuing with the next stitch. Both require that you pick up and yarn round your neck while still holding your stitch with one hand.
You will need a working yarn of the correct size to hold the hook through all loops.
With your first loop, draw the yarn back through the first stitch, wrap it around your fingers (the last loop will be on your hook) and tie off. Hold your new loop in the opposite direction from the original position of the last loop – if you are right-handed, this is southwest. If you are left-handed, this is northward. You will need to bring the working yarn behind you, just under the tension of the stitch, to pull the loop through both loops.
The toe and heel stitches are made by drawing the yarn a little bit behind you, underneath the tension of the stitch. With your needle tip, draw through the stitch and tie off, bringing the yarn and needle behind you once again. Repeat with the other side, bringing the new waste yarn and needle through both loops on the right side and left side. You will now have two loops on the right side and one loop on the left.
The three yarn loops you just created should now be placed onto your knitting needles.
Position them so that they form a triangle, with one inside the other. Work a series of single crochet stitches around the three loops, beginning with the inside most one. As with any single crochet stitch, these should be worked slowly and carefully. Draw the yarn back out of the loop and tie off. Repeat these steps until you have completed the other side.
The last step is the right leg of the stocking. This is done exactly like the first leg, only the stitch you use is on the right leg instead of the left. Draw the yarn and needle through the first stitch, wrap the new waste yarn round the hook and draw the hook through the second stitch.
Crochet increases stitches that make your stitches bigger, like in the case of a double crochet, or smaller, like in the case of a single crochet. The first stitch that you will do is a half-inch increase around your entire circumference after the first loop is reached.
Bring the needle all the way through the last stitch on your right leg, wrap the yarn around the hook and draw the needle through the remaining stitches on your left leg, making this a half-inch increase. Repeat these steps until you have completed a full-inch increase. These are called half-inch increases.
Needles can be either double-sided or single-sided, depending on the kind of project you’re working on. In a nutshell, though, needles work like pinwheels. To help you identify your cast on point, each needle that comes in contact with the rug must be a different size or gauge. Always remember to always have two sets of needles, one for each type of yarn you use, in your toolbox.
The first project, you\’ll tackle is a simple square blanket. Starting at the centre of the square, knit one-inch circular strokes. The stitches will come out, forming a loop, from which you will remove them by passing the yarn through the loops.
Yarn that is too tightly knitted will pull through the loops and become tangled, which can make it hard to get the blanket to lie flat. It\’s best to keep a bit of yarn around the circumference of the loop yarn to give it an elastic quality.
If for some reason, you aren’t able to get your old waste yarn to knit without cutting holes, you can purchase a new needle. Beginners might choose to purchase a cheap set of needles from the local craft store. The long-run is to buy a good pair of needles from a reputable online vendor.
Starting with mittens, you can either knit or crochet. Knitting takes longer because there are more stitches in each row than with crocheting. When you have completed a series of consecutive rows with one kind of yarn, switch to another yarn and continue the knitting or crocheting until the previous project is completed. Many people who crochet would rather create something a little longer than necessary, but it is possible to make mittens out of any length of yarn, just to be certain not to turn the project too quickly.
Once the project is finished, it\’s time to count the loops (back and forth). If the yarn is tight, it will take a longer time as the loops have to go back through the loops to pick up the yarn again. Some crocheters prefer to alternate even numbers of loops as well; however, the final product always has an even number of loops on the working yarn side and an odd number of loops on the receiving yarn side. Once the number of loops on the working yarn side is even, it is time to wrap the yarn once more, tie off the end, and proceed with finishing the project.
There are basically two types of yarn that a knitter will need when working with a series of stitches: bulky and super bulky. Burdock is extremely bulky and comes in a very thick variety of colours and is great for projects where the pattern requires a lot of repeating, creating a smooth fabric that can bounce back and forth between rows. It is also a very nice choice for beginners who want a really pretty fabric that can be sewn up.
The other type of yarn that a knitter might need is super bulky, which is slightly thinner than the bulky variety and more flexible. Like burdock, it is often used for projects that require the knitter to repeat between even rows of knitting. It is also a good choice for beginners who want to start off with finer yarns and who enjoy working with wool products that have a vintage feel.